By Dennis Deitchman
Being prepared for anything in the backcountry is vital. Whether it is equipment or learned skills, everyone should be prepared with some sort of medical kit. Even if it’s as simple as a couple bandaids (although you really should have a more thought out kit). I have two kits I use. One is for backpacking. It is very small, lightweight, and packs a punch in what it can do for me. The other is for my truck, and smaller outings where weight doesn’t matter.
Since backpacking season is right around the corner, now is a good time to restock or even build your kit. Some people buy pre-built kits, but those can get pricey quick, and you don’t have refills like you would for building it out yourself. The most important part of this is knowing what you’re comfortable going in the backcountry with or without. Your kit should be built around you and your capabilities. What’s the point of having a stitch kit, if you don’t know how to give stitches? That being said, make sure you know, and practice if you can, how to use everything in your kit.
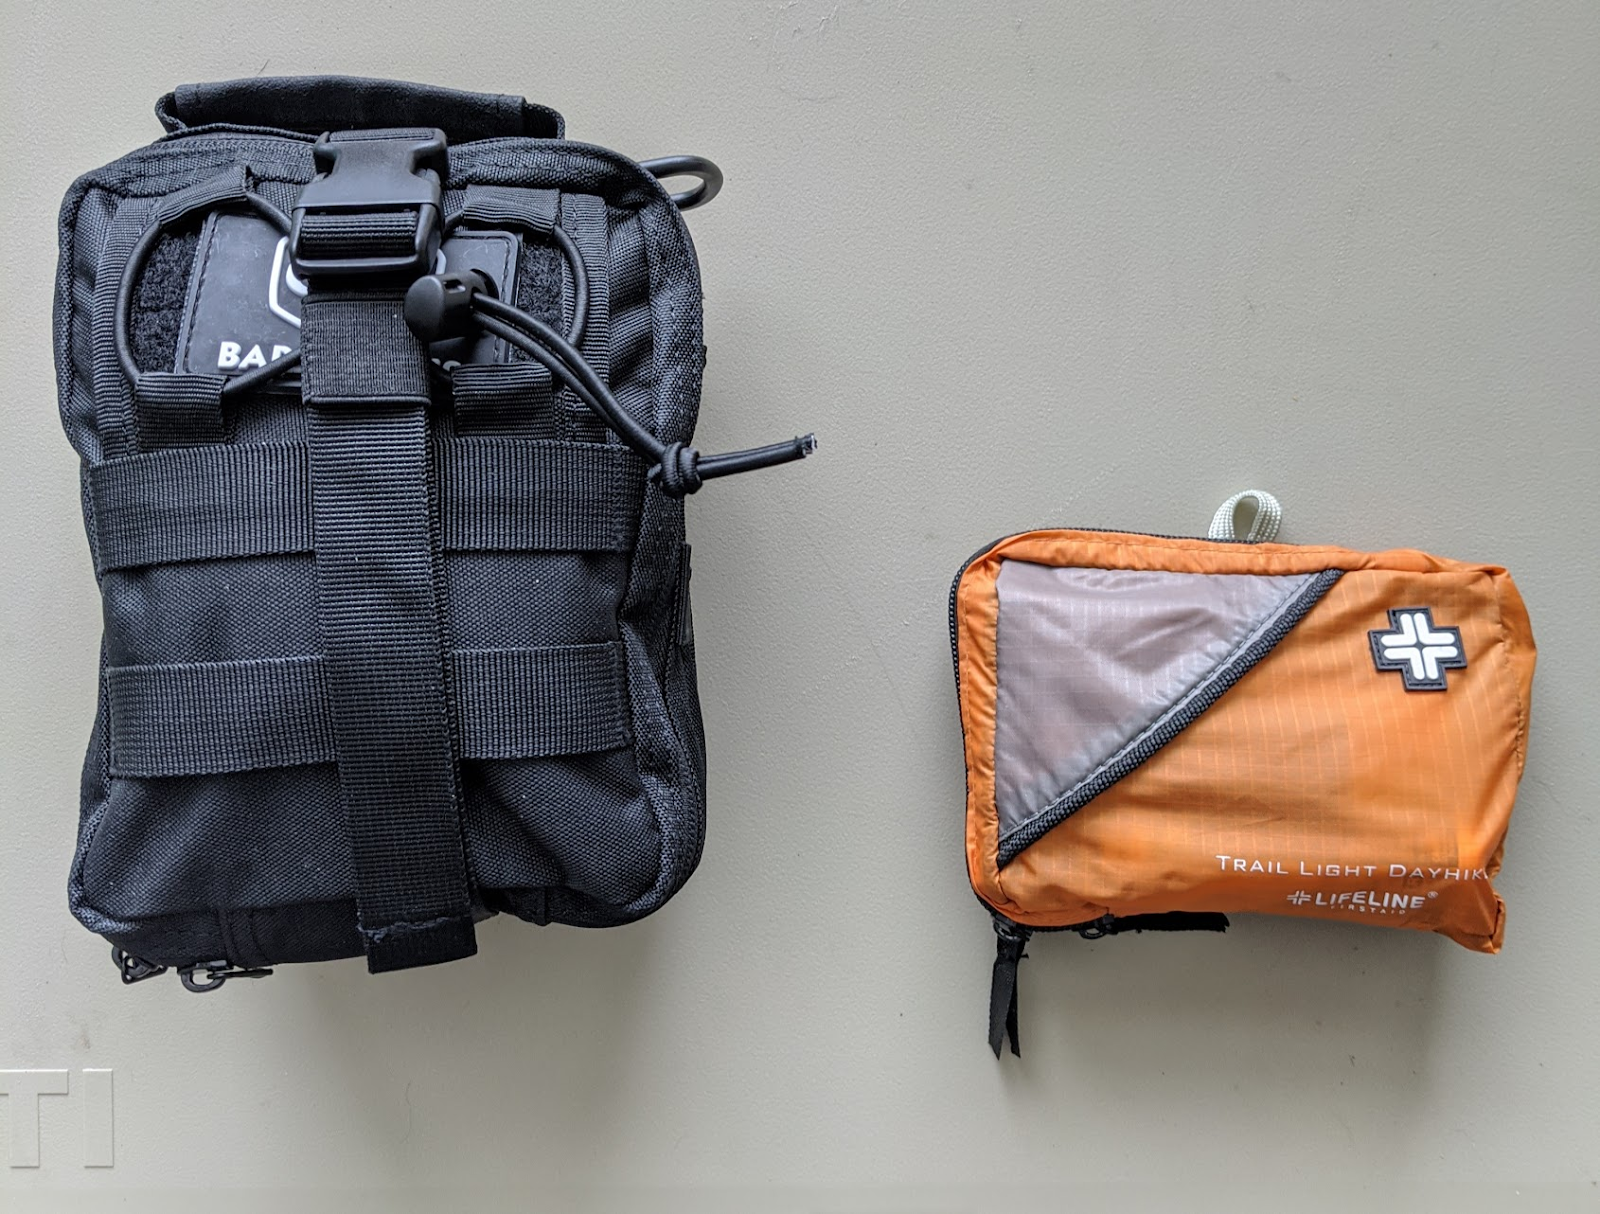
The backpacking one I have comes in at 9.5 oz, and also has some repair/survival essentials in it. When it comes to backpacking in general, multi-functional is king. I’ll break down what’s in it, and why.
backpack Kit
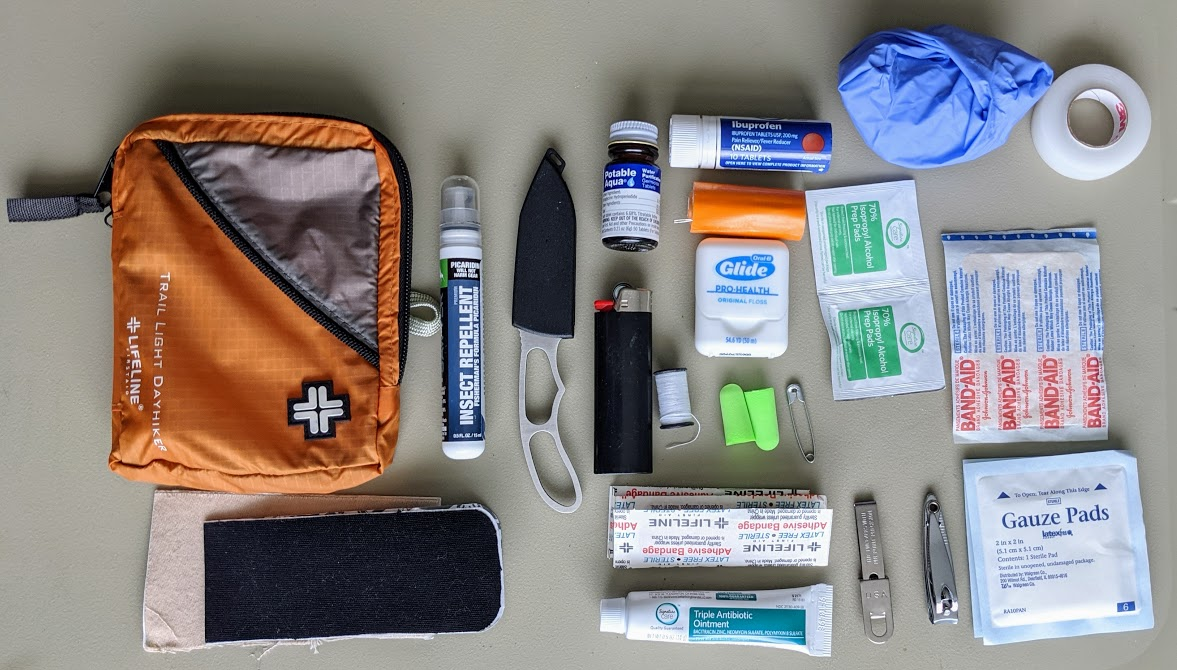
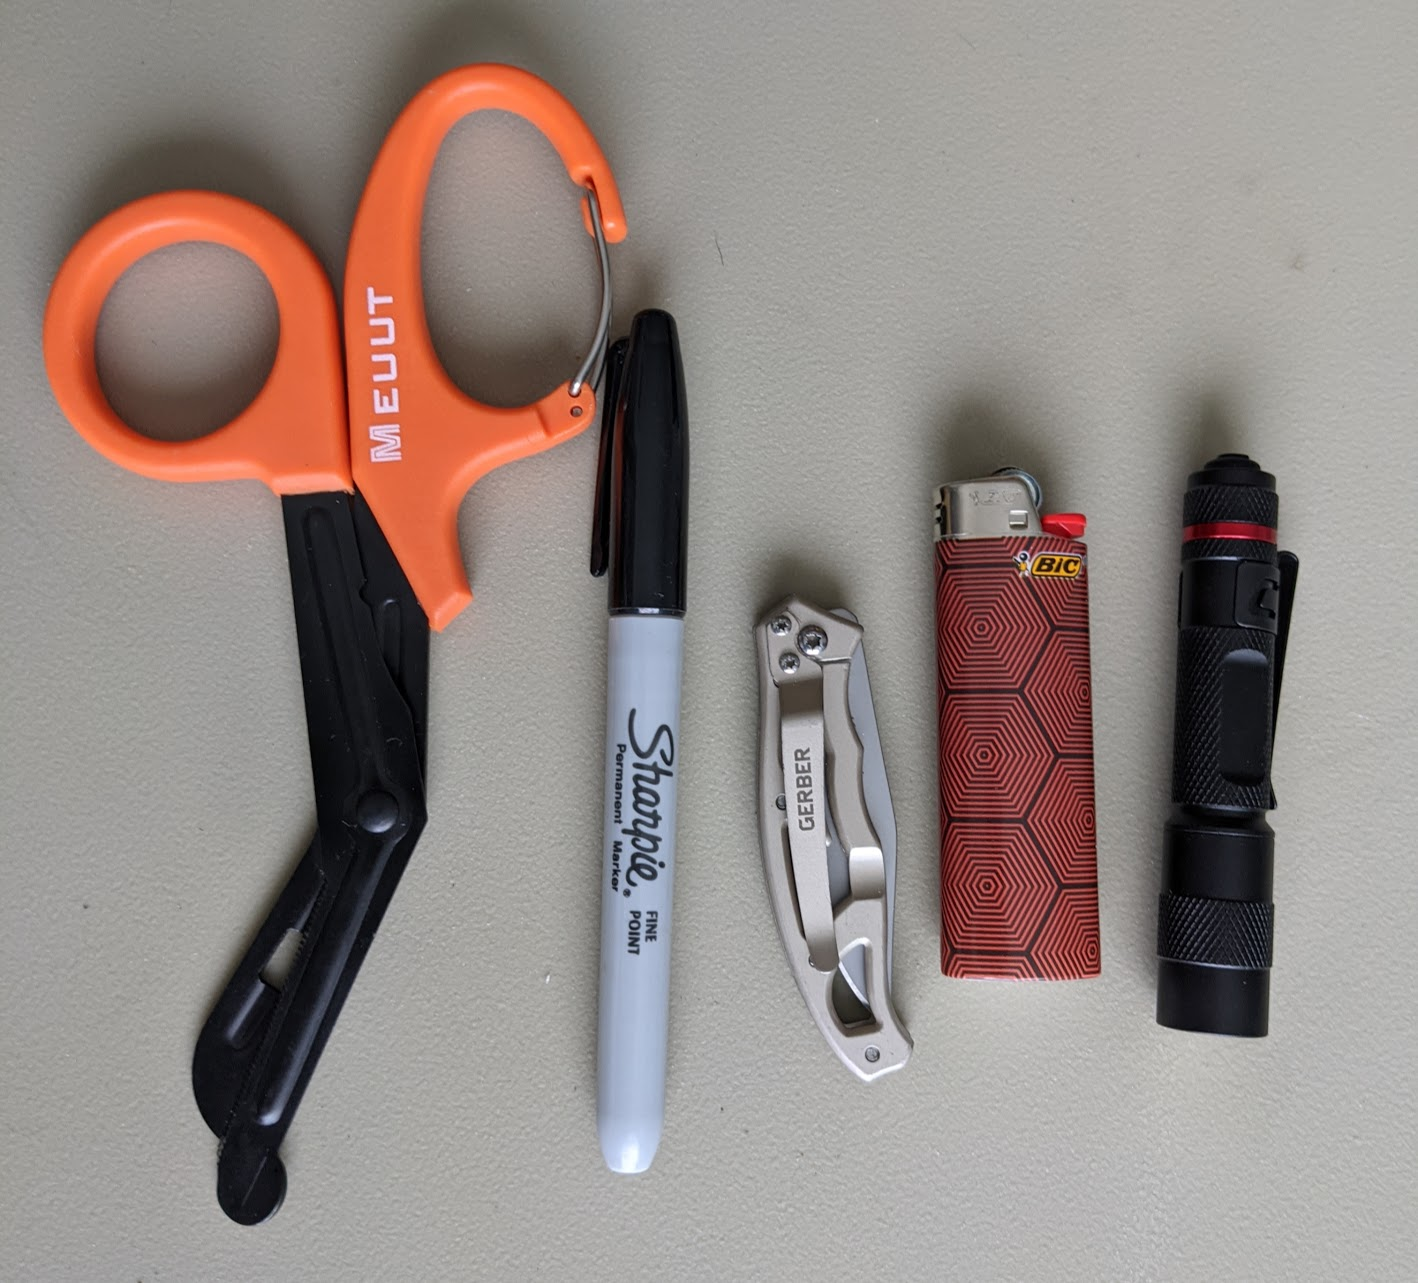
Knife
Lighter
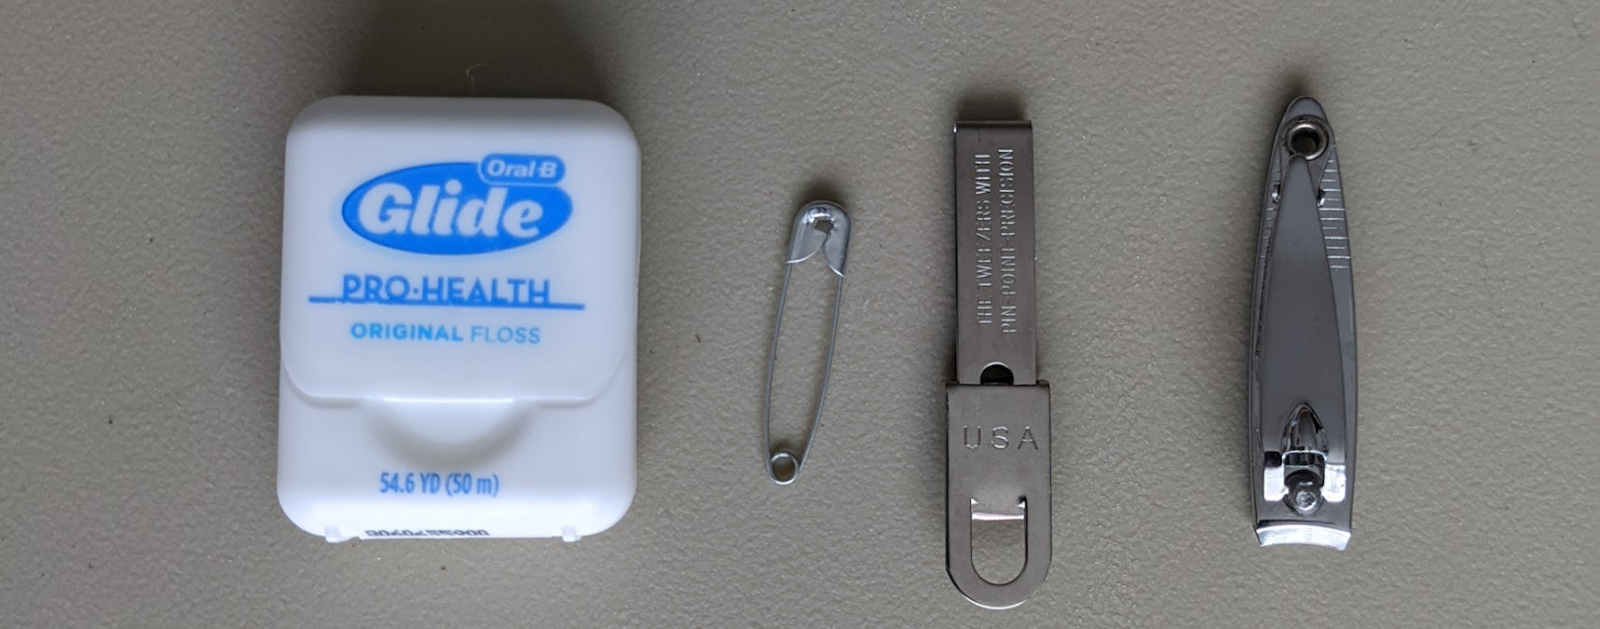
Tweezers
Nail Clippers
Ear Plugs
Latex Gloves
Duct Tape
Safety Pin
Needle
Thread
Dental Floss
Bug Spray
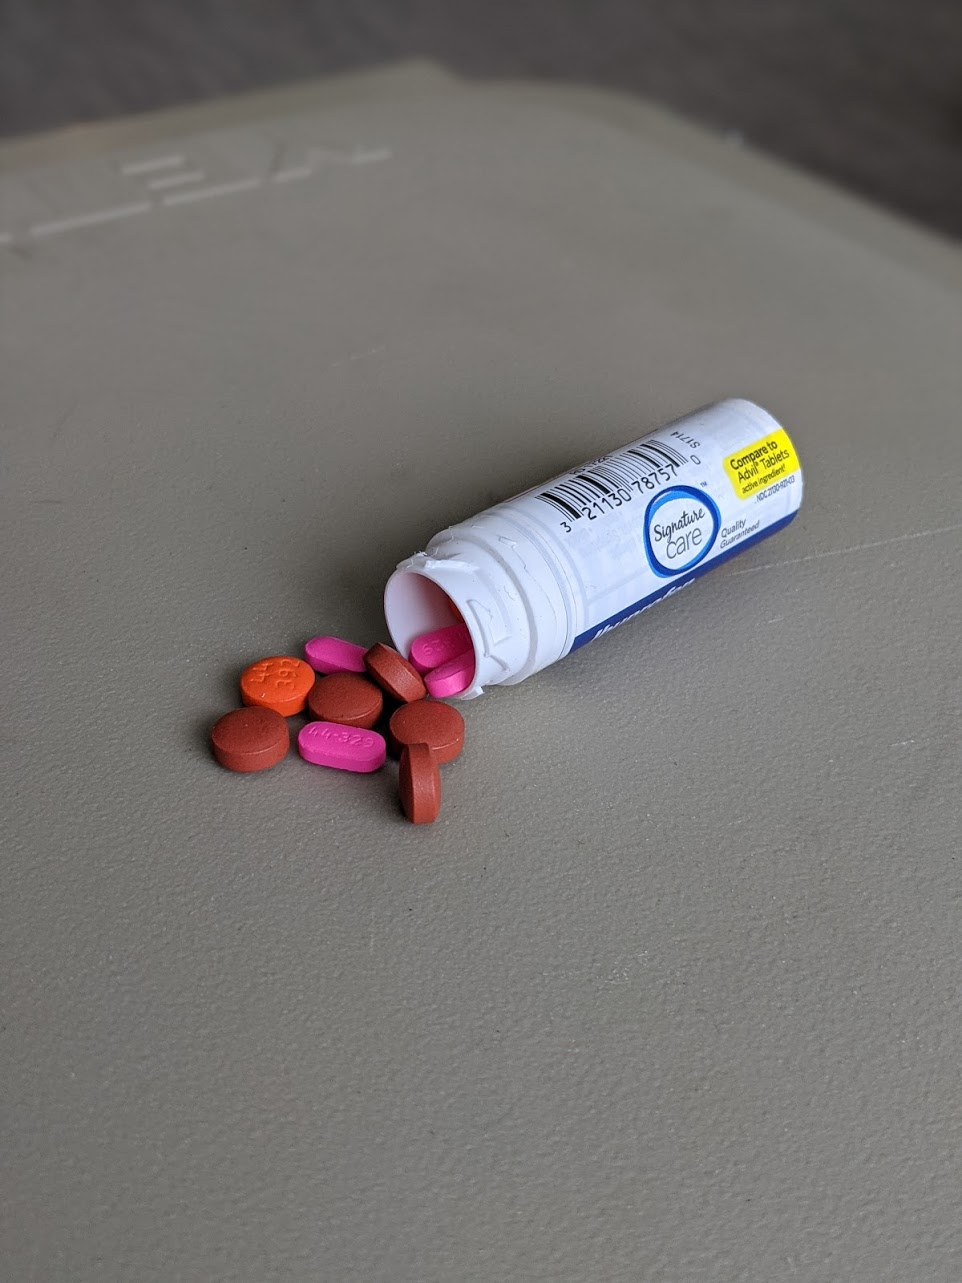
Assortment of pills (benadryl, ibuprofen, anti-diarrheal)
Moleskin
KT-tape
Bandaids
Transpore Tape
2×2 Gauze
Triple Antibiotic ointment
Anti-itch Cream
Alcohol wipes
Aqua Tabs
Backpack Kit explained
Let’s start with the basic survival items. Knife, lighter, and water purification tabs. These are pretty self explanatory. You can also go the route of waterproof matches, signal mirror, and even a space blanket.
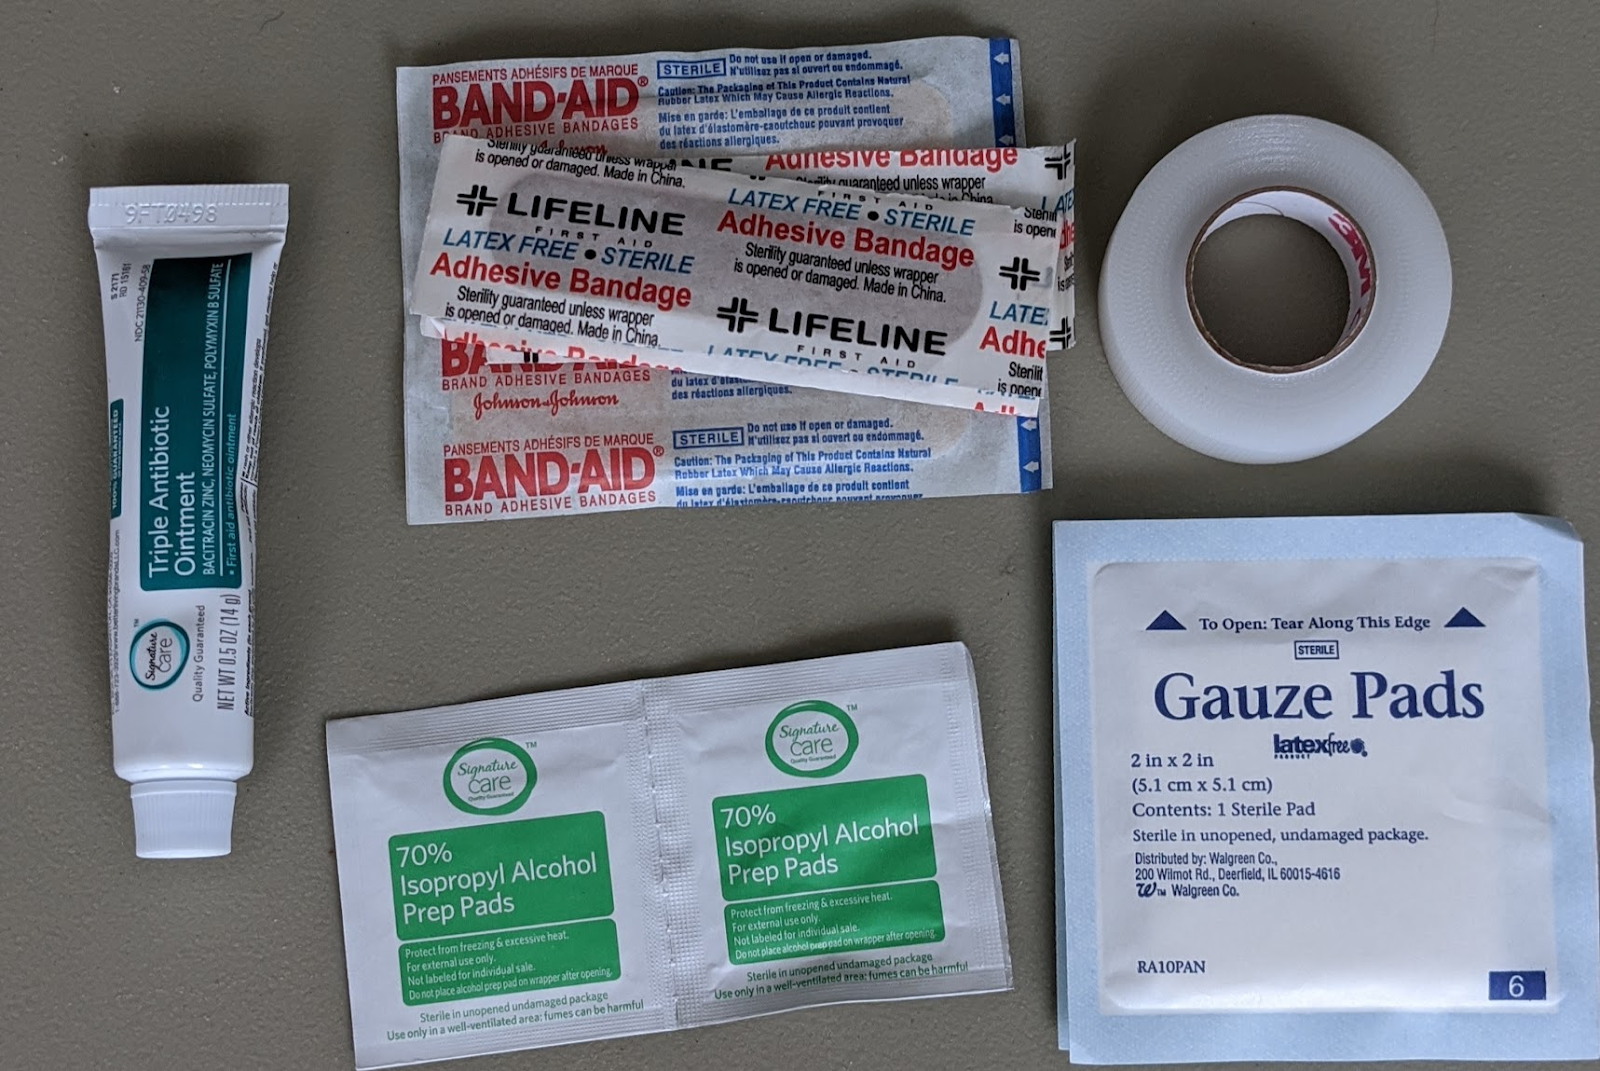
Next up is wound treatment. 99% of the cuts you get out there will be minor, and require only a bandaid. Regardless, you need to make sure it is clean. Rinse your cut off with clean, filtered water. Apply pressure if needed and apply some type of band aid. For more serious cuts, I bring a couple 2×2 packs of sterile gauze. This can be used to apply pressure, stop bleeding, and also keep a wound clean and dry. Alcohol wipes are used for sterilization and triple antibiotic ointment to prevent infection (substitute with petroleum jelly, which can also be used for fire starter). Keep your wound clean, and don’t suffocate it. Change bandages regularly.
Blister prevention and treatment is huge in the backcountry. Blisters can ruin a trip in no time, especially if you’re prone to them. To keep them from happening, wear footwear that fits properly, synthetic socks that wick moisture (merino wool are my favorite), and keep your feet dry and ventilated.
For treatment/prevention of blisters moleskin is sort of an all in one. As soon as you feel a hot spot on your foot, apply the moleskin over it to prevent the formation of a blister. If you already have a blister, apply some over it to keep it from getting worse. A cool trick I learned to treat and dry them out is at night before you go to bed, run a needle through the blister with thread attached. Leave the thread inside the blister hanging out on both ends. During the night this will wick out the liquids in there, leaving the skin in place, and preventing an open wound (remove thread in the morning). The next day cover with moleskin, and keep it clean.
Ibuprofen is like gold out in the wilderness when you’re putting on miles, and your body starts to feel it. I carry an assortment of pills, and it’s good to make sure you know when they expire. I carry ibuprofen, Benadryl, and some type of anti-diarrheal pill (this could literally save your life if you get sick with something, and can’t keep fluids in).
The last few items I carry pack the most punch, in my opinion. Tweezers (Uncle Bill’s Silver Grippers are the G.O.A.T.), nail clippers, dental floss, duct tape, safety pin. Duct tape can be used for an endless amount of things from gear repair, blisters, wounds, marking locations, etc. I fold the needle I carry inside of it, as to not lose it (just make sure to disinfect and remove sticky residue before using). The dental floss is actually not for your teeth, but for gear repair as well (it can be used for stitches also, but it should be a last resort due to the wax and thickness). Dental floss is going to be much stronger than thread. So if you rip your pants, or pack, or whatever, you can sew it up real quick, and it will be a strong repair until you can do a real repair. I personally have stitched up a giant hole in my First Lite obsidian pants, and left patched with the floss for most of the hunting season until I got it patched.
truck kit

While the backpacking kit has been adjusted over the last few years, the truck kit is new to me. This is just a general need of being prepared when I’m out and about. I looked through forums, and pre-made kits to see what people generally had on them. I talked to a good friend that is an Army Flight Medic, and in civilian life an EMT, asking about pre-made kits loaded with gear. Her response, “If someone is still bleeding when I arrive, I use a roll of gauze & tape. Ace bandage for pressure if they are on blood thinners. Direct pressure will take care of most bleeds though even if it’s arterial. Younger people have adequate platelets.” I kept this advice in mind while i was making my kit. She also brought up a good point that most of the items in the kit expire in roughly 2 years, so you are going to have to refill it anyways. I went a little more in depth with my kit, because I have basic first aid training, and am prepared to use everything in the kit:
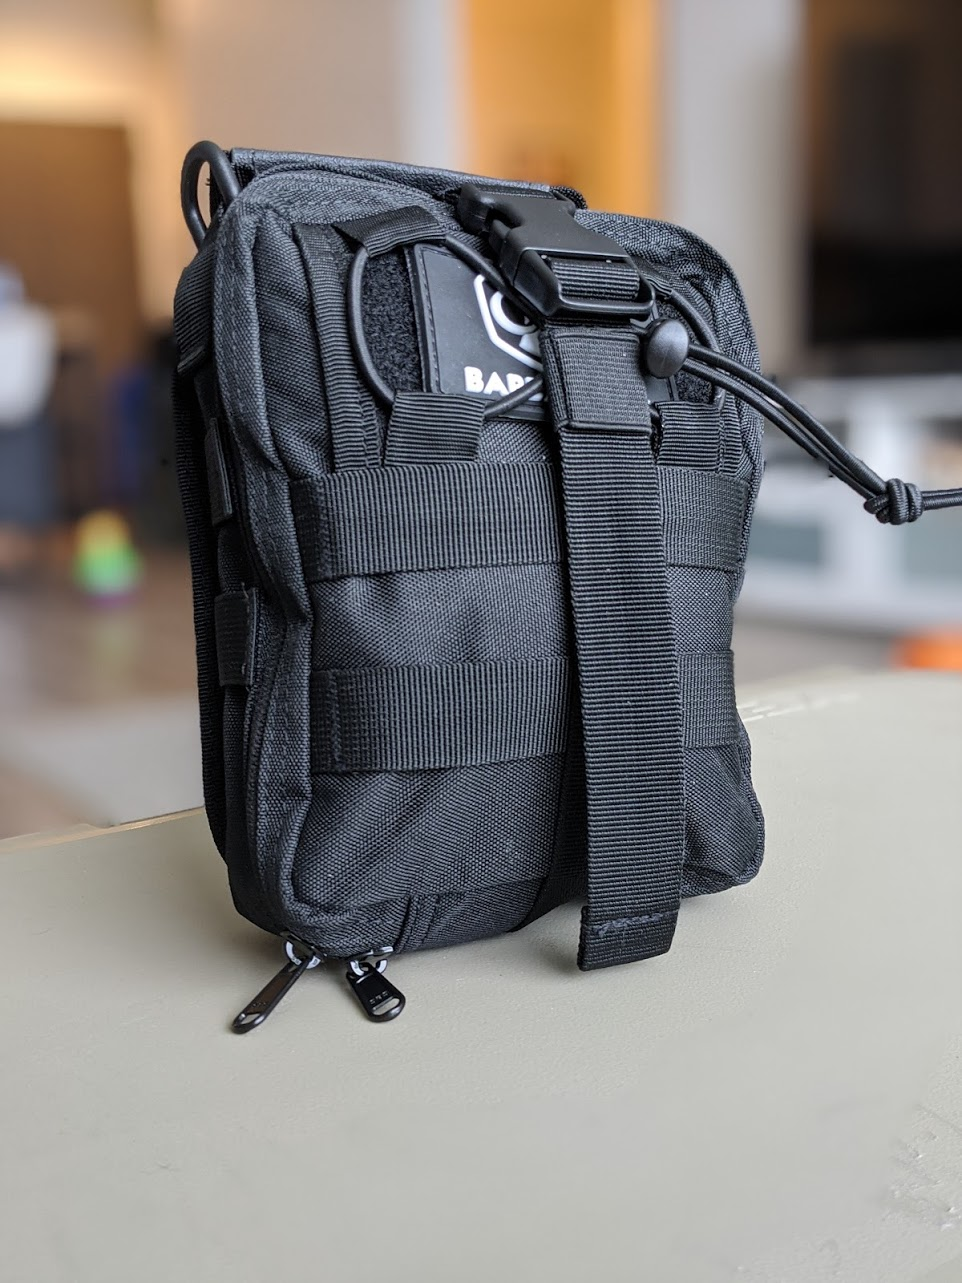
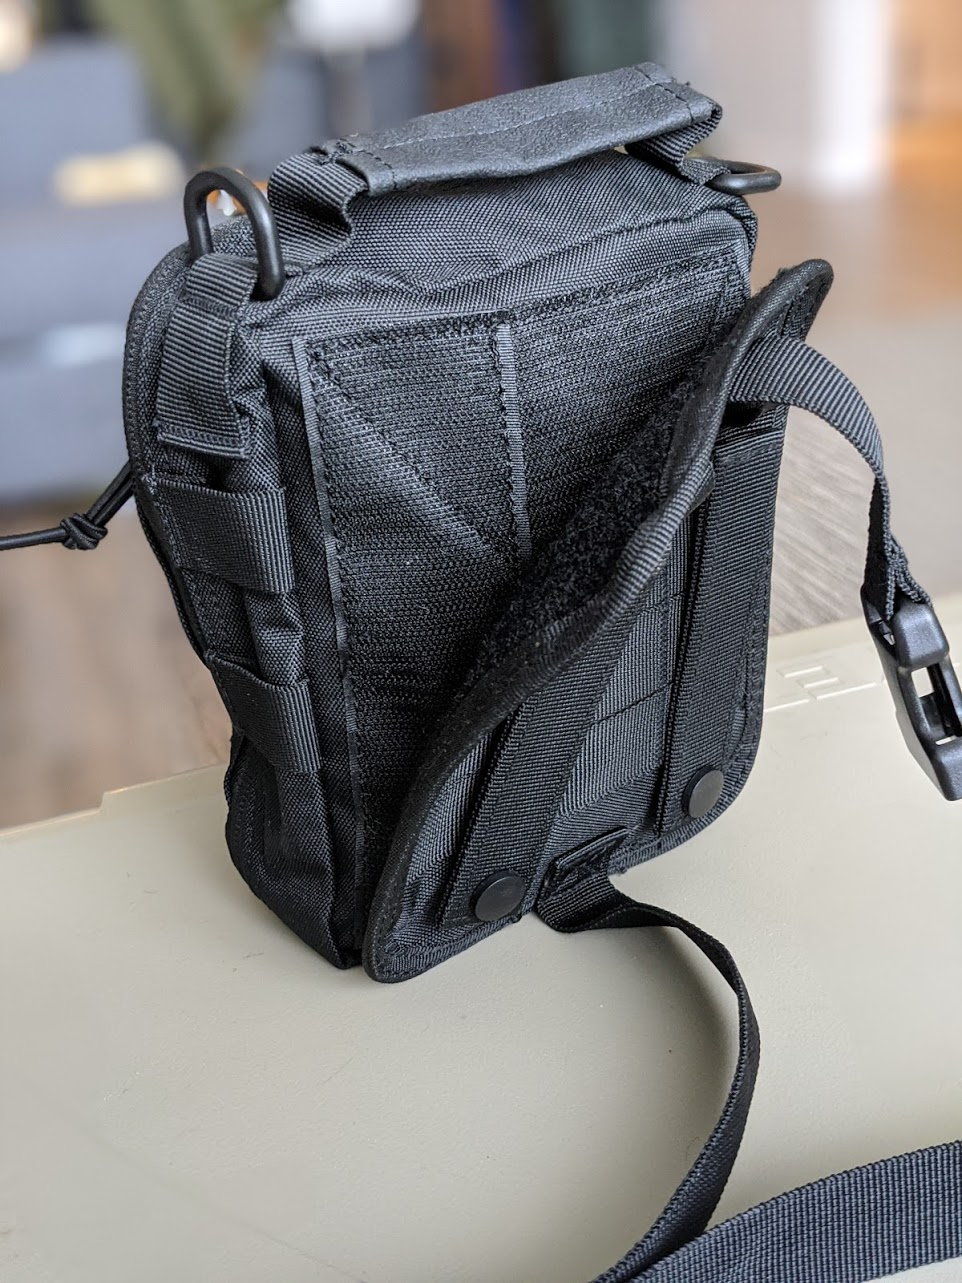
Molle Rip Away Bag
EMT Shears
Knife
Lighter
Flashlight
Sharpie
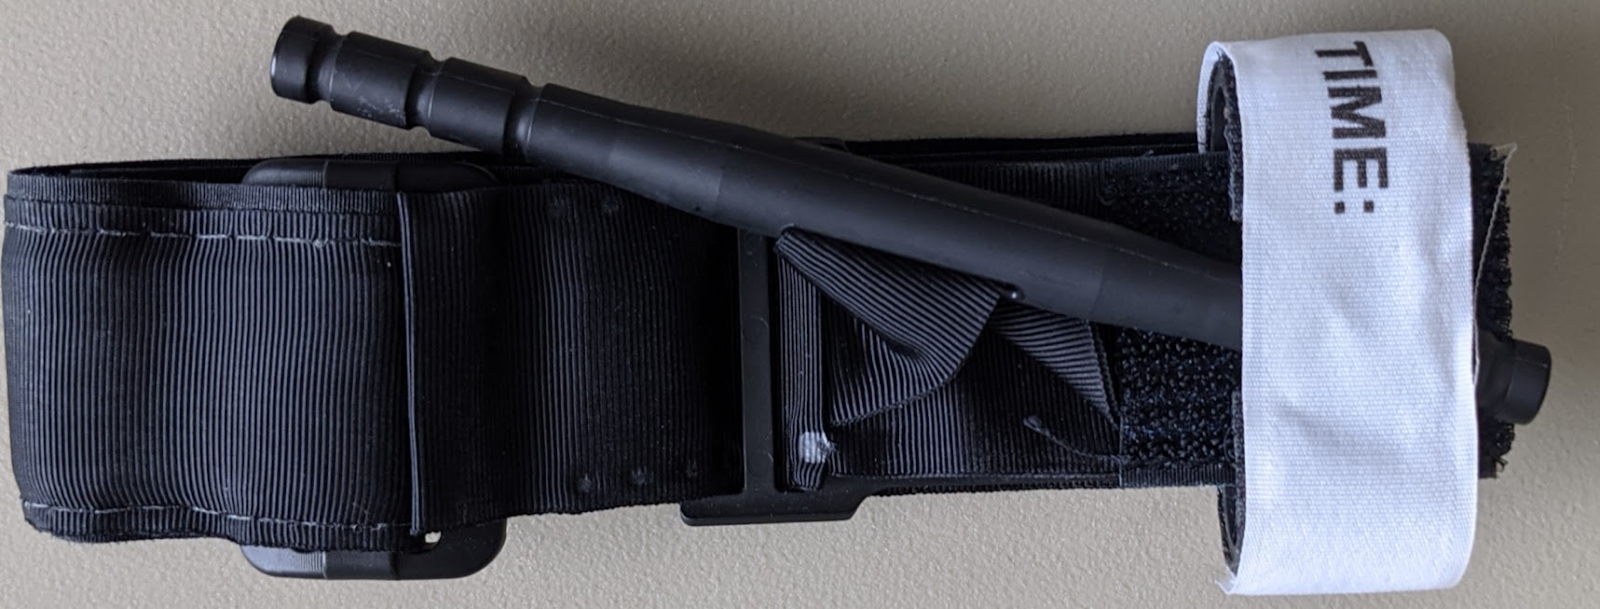
Tourniquet
Duct Tape
Cohesive Bandage
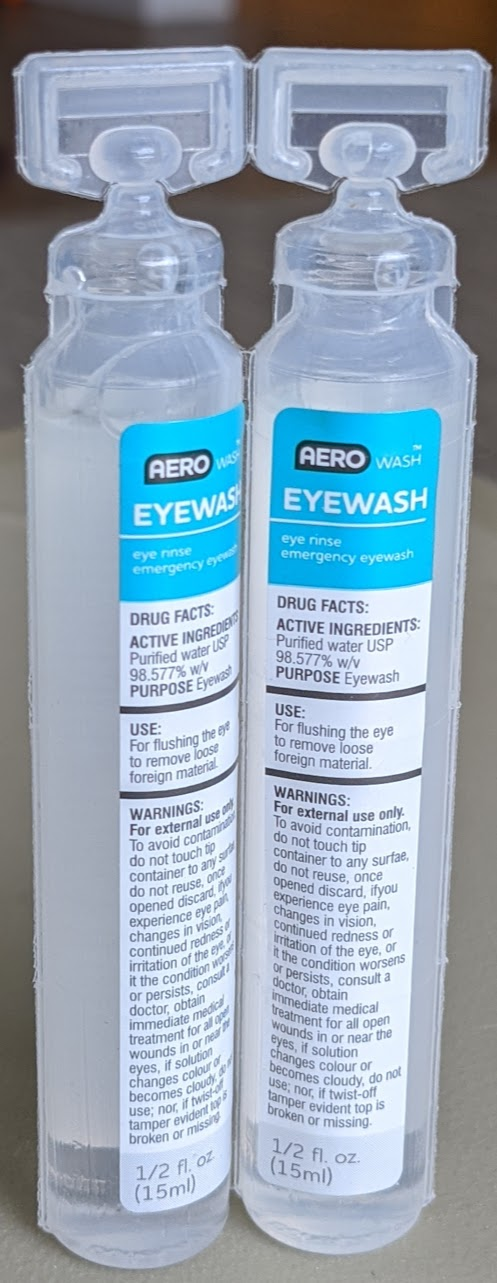
Sterile Saline Wash
Transpore Tape
Assortment of pills (benadryl, ibuprofen, anti-diarrheal, Medi-Lyte)
Latex Gloves
Hand Sanitizer
Single Wet Wipe
Alcohol Wipes
Gauze Roll
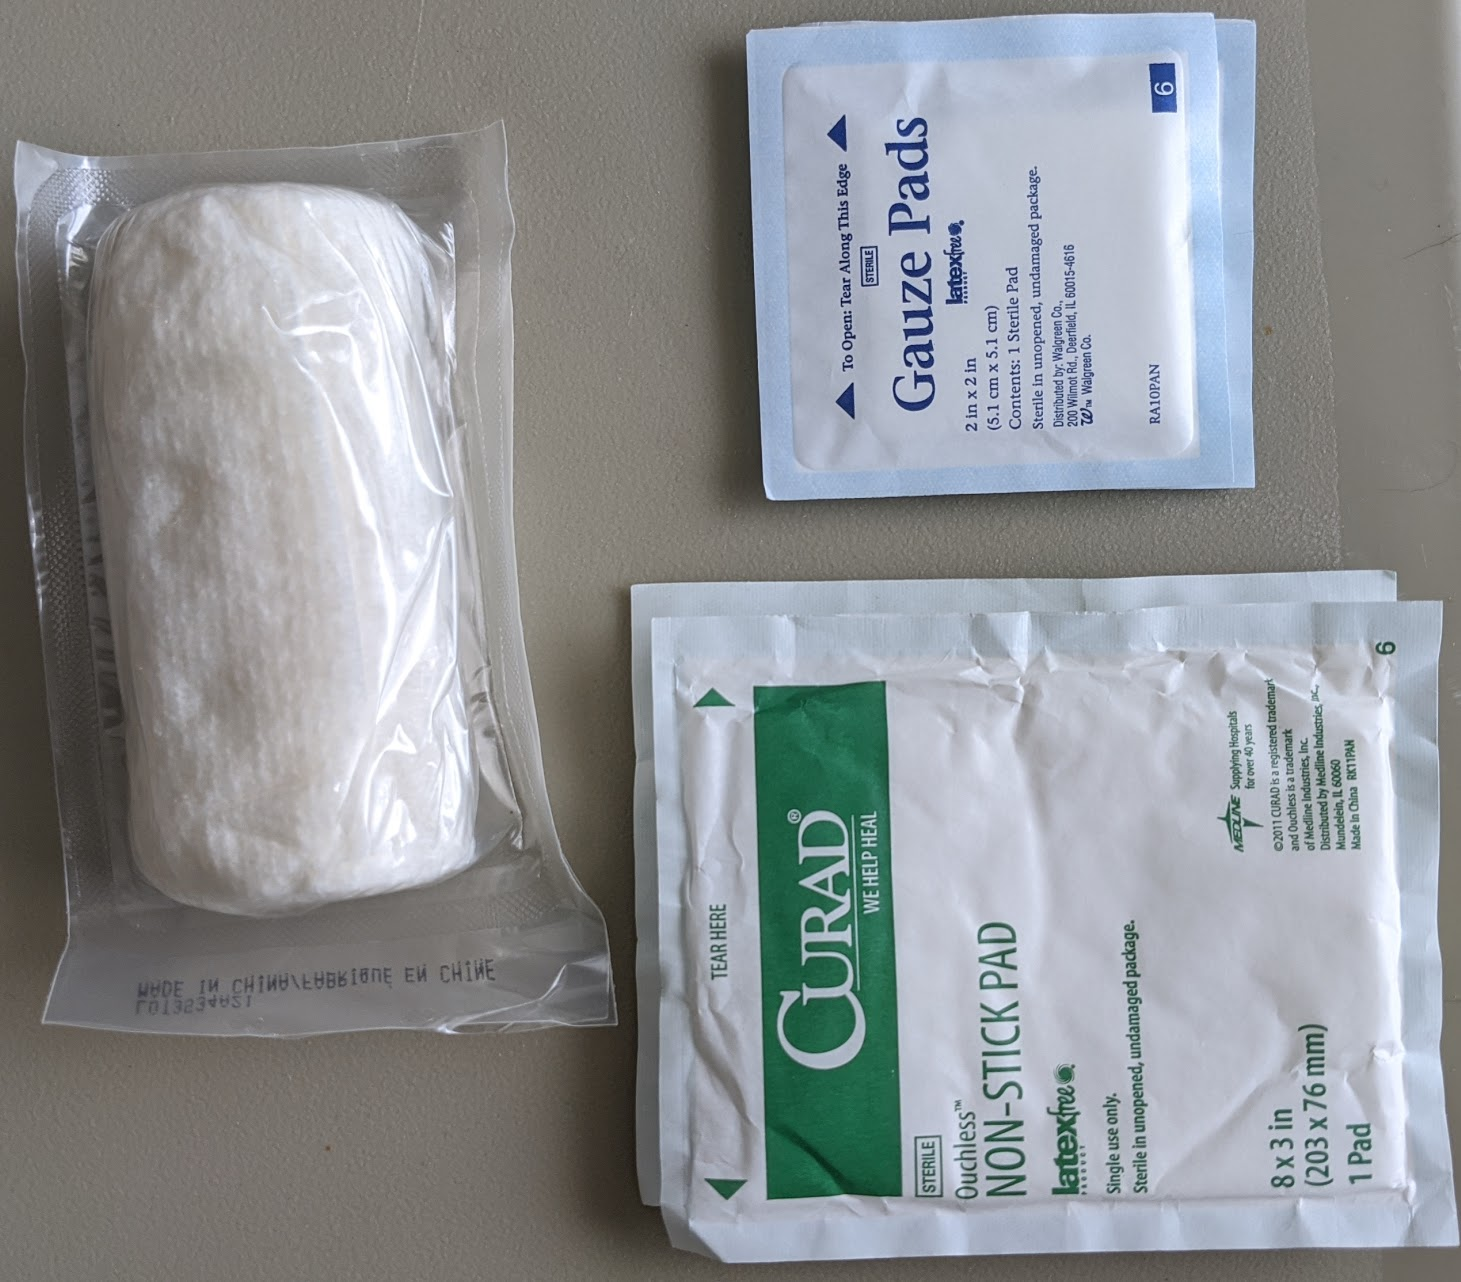
4×4 Gauze Pads
2×2 Gauze Pads
Non-Stick Gauze Pad
Tegaderm
Steri-Strips
Celox Hemostatic Agent
Creams (Triple Antibiotic, burn, and itch)
Truck Kit Explained
I like these styles of bags because they are cheap, and extremely functional. On the back side there are molle attachment straps and webbing all around the pack. The molle attachments velcro to the back of the pack allowing you to take the bag if needed without having to undo the attachments. This makes it lightning fast to deploy, and mobile.
The main compartment is where I keep the things i’ll need quickly. EMT shears for removing clothing, sharpie (for writing tourniquet times, quick clot times, and any other emergency medical info you need to share), a knife, lighter, and small flashlight.
Next is the tourniquet (make sure to understand completely how to use it). They are easy to use, and extremely useful in situations where pressure is not enough to stop the bleeding. Take a class, watch some videos, learn how and when to use it. Be sure to mark the time on it so doctors know when it was applied (which is beneficial for tissue and limb damage).
Next to the tourniquet is the roll of gauze. There’s many different types of rolled gauze. Some have a clotting agent built in for packing wounds, some are vacuum sealed. Gauze for me pulls double duty as a wound packer, and a wrap in place of an ace bandage. In the big zipper portion I keep the same 4×4 and 2×2 gauze pads as in the backpack kit.
Sterile saline has a ton of uses as well, including washing out eyes and wounds. I use .5 oz single use bottles. These are labeled as eye wash, but as long as it says “sterile” there shouldn’t be any lubricant additives that would irritate a wound.
For band-aid alternatives I keep Celox, steri-strips, and tegaderm. Tegaderm is a clear bandage that keeps bacteria out, and lets oxygen in (amazing for new tattoos). Steri-strips are for closuring wounds that are straight such as a knife cut. An alternative to steri-strips would be superglue. There are different types of superglue. The medical version doesn’t harm skin but is very expensive. Using regular superglue will work, just know you have a high chance locking bacteria in. Celox is a hemostatic agent. It clots blood and is useful for people on blood thinners. If you use this, keep the package, write the time, and bring it with you to the doctor so they are aware. It’s relatively cheap and takes up no space.
The final items are the basic pills, creams, medical tapes, and single wet wipe. These are the same as the backcountry kit listed above. Instead of pills in bulk, I use the single packages. My reasoning for this is tracking expiration dates.
In the end, being prepared is critical and something is better than nothing. I am not a medical expert, but this is what I adapted for my experience and uses. Whatever route you go, make sure you are informed on how to use it and train with it if you can. Schedule to attend a first-aid course and adapt your kit to you, and what you are comfortable with. Just remember your kits and skills are only to hold you over until real medical help is available, so don’t overthink it.
2 thoughts on “First Aid Kits | From your vehicle to the backcountry”