By Johnny Mack
If you have been following along with our Hunting 101 series, you should now have the knowledge and confidence to find land to hunt on (part 1) as well as be able to find animals (part 2). Part 3 is everything you need to know about the importance of optics and glassing for success. The term “glassing” is an action word to describe the use of binoculars or spotting scopes to look for animals.
Your ability to harvest animals is directly related to your ability to see them. This is where quality optics can be the difference on a hunt as well as how you use them.

Is there really a difference in quality?
The saying, “You get what you pay for” is a very good rule of thumb to follow, especially when shopping for optics. Quality glass can be the difference in spotting your quarry, taking aim and delivering. Versus packing up and heading home with 15 minutes of shooting light left. The better the glass, the better light gathering and longer hunting opportunities you will have.
You may not be able to see very well with the naked eye, but looking through your binoculars at a dark shadowy hillside during twilight can make it come alive. This is where all of your optics need to shine. If you can spot a shooter buck in your binoculars but can’t find the animal in your rifle scope, you are going to miss precious opportunities. In short, the more expensive the optic is, the more precious minutes you will get out of your hunt. But don’t let the price tag on gear stop you from getting out and using what you have. In the words of Stephen Stills, “If you can’t be with the one you love, then love the one your with.”
Price Point vs. Origin of Glass
Hunting doesn’t have to be an expensive sport if you do not want it to be. There are always cheaper options to choose from when it comes to gear. However, when talking with experienced hunters, there are two things that hunters will recommend not skimping on. Those two items are boots and optics.
When referring to optics for hunters, there are many things to consider. If you are like me and on a budget, then you are typically trying to squeeze the highest quality item into the fewest amount of dollars possible. In the world of optics, once again, you get what you pay for, and this is where knowing what makes a quality optic justifies the price point (within reason).
Price point is directly reflected upon the origin of glass. The cheapest optics are going to have glass from China. The next step up would be the Philippines. After that, it is well-recognized that Japanese glass is high quality and will demand a price point accordingly. At the top of the list is European glass. This is where companies such as Swarovski, Leica, Zeiss and Schmidt & Bender are set apart from the rest of the competition and draw a price tag that can blow your mind with how expensive they can be.
Each optics company is going to have different price points to match the needs of the buyer. For example, Vortex Optics offers 4 different price points for their optics. Their top of the line Razor series is all made with Japanese glass. Their Viper and Diamondback models are made in the Philippines, and their Crossfire lineup is Chinese made. One thing to note is, European optics companies also have different price points for their models and just because it is an European company does not mean it was made there.

Warranty – Something you hope you never have to use
One thing to keep in mind when purchasing optics is the warranty. Typically warranties are something you hope you never have to use, but is really nice to have if you need. Some companies warranties are only good for the initial buyer, are not transferable and only last a few years. While others companies have transferable warranties, are good for a lifetime and cover any type of damage.
Binoculars
When choosing binoculars for hunting the three common magnifications are 8x, 10x, and 12x. All three have their pros but it will be up to you what you prefer. Most people who run 12x binoculars will run them on a tripod for long glassing sessions and might even forgo packing a spotter. 12x power binos are going to be larger and heavier but provide more magnification and light gathering through a larger objective lens size.
Common objective lens sizes for 8x and 10x binos is 42mm. You can find 10x binos that have a 50mm objective lens to help maximize the light gathering just like 12x.

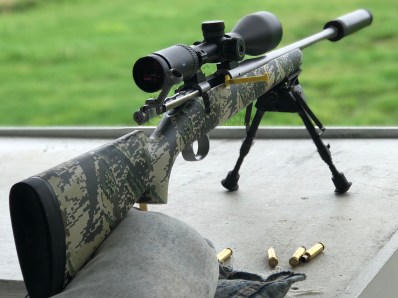
Rifle Scopes
When choosing a rifle scope, take into consideration the terrain that you will be hunting the most before you make your purchase. The more bells and whistles a scope has, the more expensive it will be and you might not use depending upon terrain. When hunting thick brush or where shot distances will be under 200 yards, you will be happy with a 3-9x scope and a duplex reticle.
If you are expecting to take longer shots where you would need to account for bullet drop, then a scope with target turrets or a bullet drop compensating (BDC) reticle, where you can adjust easily for elevation or distance will be beneficial. Using a target turret or BDC reticle for bullet drop will require in-depth knowledge of bullet speed as well as other factors that will need to be studied and practiced.
One thing that is not commonly taught is the difference between first focal place (FFP) and second focal plane (SFP) scopes. FFP scopes are more expensive when comparing the exact same features and build components with SFP scopes. Besides the cost, the major difference is on FFP scopes, the scale of the reticle remains in proportion to the zoomed image. Meaning, as you increase the magnification of the scope, the object and your reticle will both enlarge. On second focal plane scopes only the object you are looking at will enlarge as you increase the magnification.
The beauty of FFP scopes is that your drop chart for bullet trajectory stays the same no matter what magnification your scope is set at. The same does not hold true for second plane optics. There are two downsides of a FFP scope. The first being that the reticle is hard to see on low magnification. Creating difficulty in close range hunting or shooting applications. The second being that the reticle on high magnification can be thick causing your reticle to cover your target at long distances.


If you opt for a scope with higher magnification, it is important to remember that all movements are magnified. Higher magnification also makes tracking a moving target more difficult. A helpful tip is to keep your scope on its lowest magnification at all times until you need it magnified and NEVER use your rifle scope in replacement of binoculars.
Spotting scopes


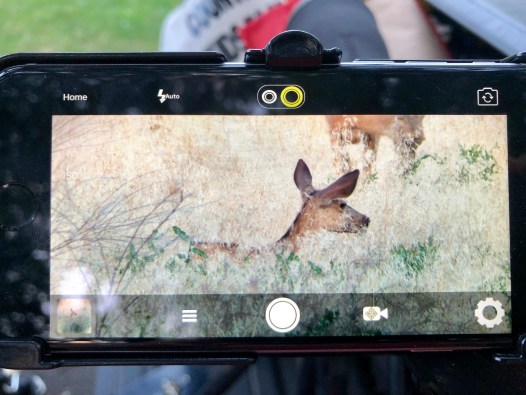
Spotting scopes are not necessary for success, but can help you determine specifics of an animal that your binoculars will not allow. Such as confirming if an animal is legal to shoot or not. They are however extremely beneficial when hunting in large and expansive terrain, and can be a lot of fun for taking pictures and video.
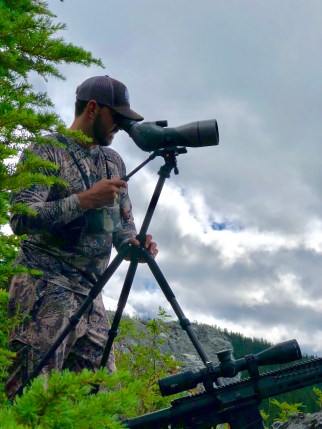
The one thing that rings true with all optics is that, you will always want more magnification. Do you need more? That is something for you to decide. More magnification means more weight to carry. Something to definitely consider when going on long treks.
When I first started down the road of spotting scopes I had an 11-33×50 that worked and did the job, but quickly found myself moving into higher magnification. For me, the magnification and larger objective justified the extra weight in my pack. The other thing to consider when deciding on whether or not a spotting scope is for you will be if you have the funds available for a tripod as well.
Tips for success

- Let your eyes do the walking. Try to use your optics to find animals rather than relying on bumping into them as you move.
- Pick a spot to glass from that has a great field of view. If the view isn’t perfect try glassing the same area from different angles. You might pick up an animal that was hidden from your previous spot.
- Start at the skyline and edges of the terrain in which you are glassing. This includes looking into the transition areas from tall timber to smaller flora.
- Be patient and work a grid. Do not just randomly glass and look all over for animals. Be specific and precise with how you cover all of the terrain.
- Look for parts of an animal and not the whole thing. Nature has consistent lines and shapes to it. When you see something that goes against the natural lines and shapes, take a closer look. The V you are looking at could end up being a head with ears. Be sure to look for antler tines, ear or tail flicks and lastly dark spots that move after 10 seconds.
- Early morning and evening, be sure to glass game trails. Animals will be on the move. During the day animals will bed down. So look in the shadows and under trees and bushes.

If you have any questions, want to know more, or have topic ideas feel free to email us by using the contact link from the menu or direct message us on Instagram @washington_backcountry. Thanks for reading. For more helpful tips and insight, be sure to check out our This is How I Hunt series as well as our Hunting 101 series on YouTube (Link).